Wednesday, December 22, 2010

Kaylee's room

This was such a fun room renovation. My client wanted to surprise her 12 year old daughter for her birthday. I think I liked it because it gave me a chance to be all super sleuth. I did most of the prep work before like sewing and painting furniture so we could get it done in two days while her daughter was away at Grandma's.

Here's the room before...

Rachelle striking a pose on the bed.

The room is about 10x12 so we had to take out the closet doors for a homework space.


And here it is after...


Our budget was $300. Thankfully, she had quite a bit of things in her closet that I used in the room, like the curtain rod, frames, and the armoire. My client liked the headboard I did in Alicia's bedroom so I did one for her daughter. You can find doors for around $20 and the molding is about $10. I spent the most money on the bedding, again. The ruffled quilt is from Home Goods and the polka dot duvet was made out of sheets from Target. I ordered the poppy fabric to make the pillows off etsy and I made the black ruffled bolster pillow. The desk was from craigslist for $25 and the night stand is from this little thrift store on Ocotillo and Ellsworth called New 2 U. I got the chandelier and feather pillows at Ikea. Ikea is the cheapest place I've found to get pillows, duvet inserts, curtains, lighting, really delicious buffalo chicken wraps, and other things. And they have an "as is" section where you can get returned items for a fraction of the price. Good thing they're all the way in Tempe or I'd probably go there every day.

We got a video of her walking into the room that I'll try and post later.

Tuesday, December 14, 2010

Before and after

I refinished this armoire for a client. I forgot to take pictures of it before I started painting. Oh well...
Before

After


I'm also in the process of a bedroom redo for a 12 year old girl. She wanted her daughter to have a new room for Christmas. Is that the best Christmas present or what? My client loved the headboard I did for Alicia's room and wanted one in her daughters room. I'm probably not going to post anything else until the room is done so see you next week!
Here is a peek at the headboard...

Monday, December 13, 2010

Have you seen?


I am in LOVE with Vintage Junky. Her latest posting on Christmas decor had my mind buzzing. Click here to see what she did. SOOOO pretty.

Friday, December 10, 2010

New front door

You know those project that go really well. Too well? That's how my front door project was going. My husband found this door for me at Stardust in Mesa. It was $20. He knew I'd love it so he stuffed it into the trunk of his car and brought it home. I took one look at it and was smitten.

Then we turned it over and saw that whoever owned it first, also owned a dog that had a small bladder.

So I slapped on some wood filler, sanded it down, and painted it black. Then I went to hang it with my husband and his bum knee (he just had surgery).

The hinges aligned perfectly. The door was almost the EXACT size as my old one. It was a sign. It hung like a dream (that's what... nevermind). The old hardware fit perfectly as well and went in really easy.

Right when I was super impressed with myself, I went to shut it and the lock and the doo-hicky that keeps the door shut were off about 1/2". Boo. Being the woman I am, I had to use pretty much everything else except a chisel to fix it. Flat head screw driver and a hammer, a drill with a bit, a kitchen knife, you know... the things I had in my purse. It all worked in the end though. Even if it took 6 hours longer than it should have. The windows let in so much more light now!

My old door before

My new door before

My new door after

Thursday, December 9, 2010

Jen's Stockings

My friend wanted me to make some stockings and she really liked the ones from Ballard Designs. I took some creative licensing and came up with these. It's a project with..... ruffles. Surprised?


Linking to
freckled laundry

Wednesday, December 8, 2010

Feature

I was featured on Polly Want a Crafter today. It was a project I did a while back called "Love Letter Art". One of my favorites of hers was a feature on a girl named Haylie not too long ago for some cute chalkboard ideas. Stop by her blog to check it out!

Friday, December 3, 2010

Cupcake charm

These cupcake charms have gotten out of control popular lately. My only beef with them is that if my 5 year old runs while she's wearing one, it might knock out her front teeth. Her two front teeth may be all she wants for Christmas NEXT year.

I'm not going to post a tutorial here, just a bunch of pictures. I'm pretty sure if my 5 year old can follow just the pictures, so can you.


Just follow the baking instructions on the package of clay but double the time because it's so thick. You can get the clay and the metal pin from Hobby Lobby or Joanns. I brushed a little elmers glue on the top and added some sparkles to look like sprinkles after it was baked. People charge $5-$8 for these at bead parties and the supplies were about $15 total. But we made 30 of them. What I'm going to do with 30 cupcake charms is beyond me!

Ballard Design knockoff

I copied these pillows to give bring as our gifts to a Christmas party tonight. I guess if anyone reads my blog that's going, they'll know what I'm going to bring. Dang. The ones from Ballard Design look like this

And here's mine


Next time I want to use a darker colored linen and maybe add some ruffle ornaments on the front.

Thursday, December 2, 2010

Ruffles

Ruffles seemed to have taken over my life lately. It's a little feminine for my army husband. I figured if I use it on burlap, the manliness of the fabric will cancel out the girlie-ness of the ruffle. Right?


But my tree sure looks better.

Wednesday, December 1, 2010

Ruffled apron

I ripped this apron off of a version Pier 1 sells. Theirs is actually relatively inexpensive but I'm too lazy to go in there with all 4 of my kids. Plus I'll inevitably have to end up buying something else that Porter broke just by looking at it. 3 year olds are talented that way.

So I'll try my dangdist at a tutorial. I don't know all the sewing lingo since I'm sort of a spring chicken having opted for wood shop instead of home economics in school.

First cut your 45" fabric into 3 or 4 strips. The size will differ depending on how many, and who it's for.

Next, roll and straight stitch one side of the fabric.

Then set your machine to do the longest straight stitch and sew a line down the other side.

Grab one string and pull, gathering the fabric into a ruffle.

Next, cut out a square panel and hem what will be the bottom edge of the fabric. Again, the size of the square will depend on who it's for, a kid or adult and how tall (or short in my case) they are.

Pin the ruffled strips onto the panel to where they cover the bottom ruffle by a couple inches.


Sew the ruffles onto the panel.

Flip the panel (now with ruffles sewn on) over and roll and pin the edges and sew a straight stitch.

Lastly, pin some extra wide double fold bias tape onto the top and sew it.

The end. Sorry if you didn't understand a word, hopefully the pictures will help guide you through my 3rd grade version. Hey, I'm not an English major. Here's my son, sporting the apron like a cape. He ran around the house all day with it on "tillin bad duys". I didn't have the heart to tell him that no bad guy would be afraid of him in this sissy cape.

Saturday, November 27, 2010

Alicia's bedroom

I finished my friend Alicia's bedroom finally and here's the end product. I didn't take any before pictures so you'll have to imagine it. Let me set the "before" scene. Imagine white walls... and a king sized mattress. That's it. We got rid of her old furniture she'd had since she got married so I had to find all new stuff. Here are a couple before pictures of the furniture and other items I got on craigslist and thrift stores. I also used a few accessories she already had.


I painted her room Gobi Desert from Behr. It's absolutely my favorite neutral tan. She really wanted a relaxing retreat so I knew I wanted to do a ton of white. And blue's her favorite color so the palette was the easiest thing about this room.

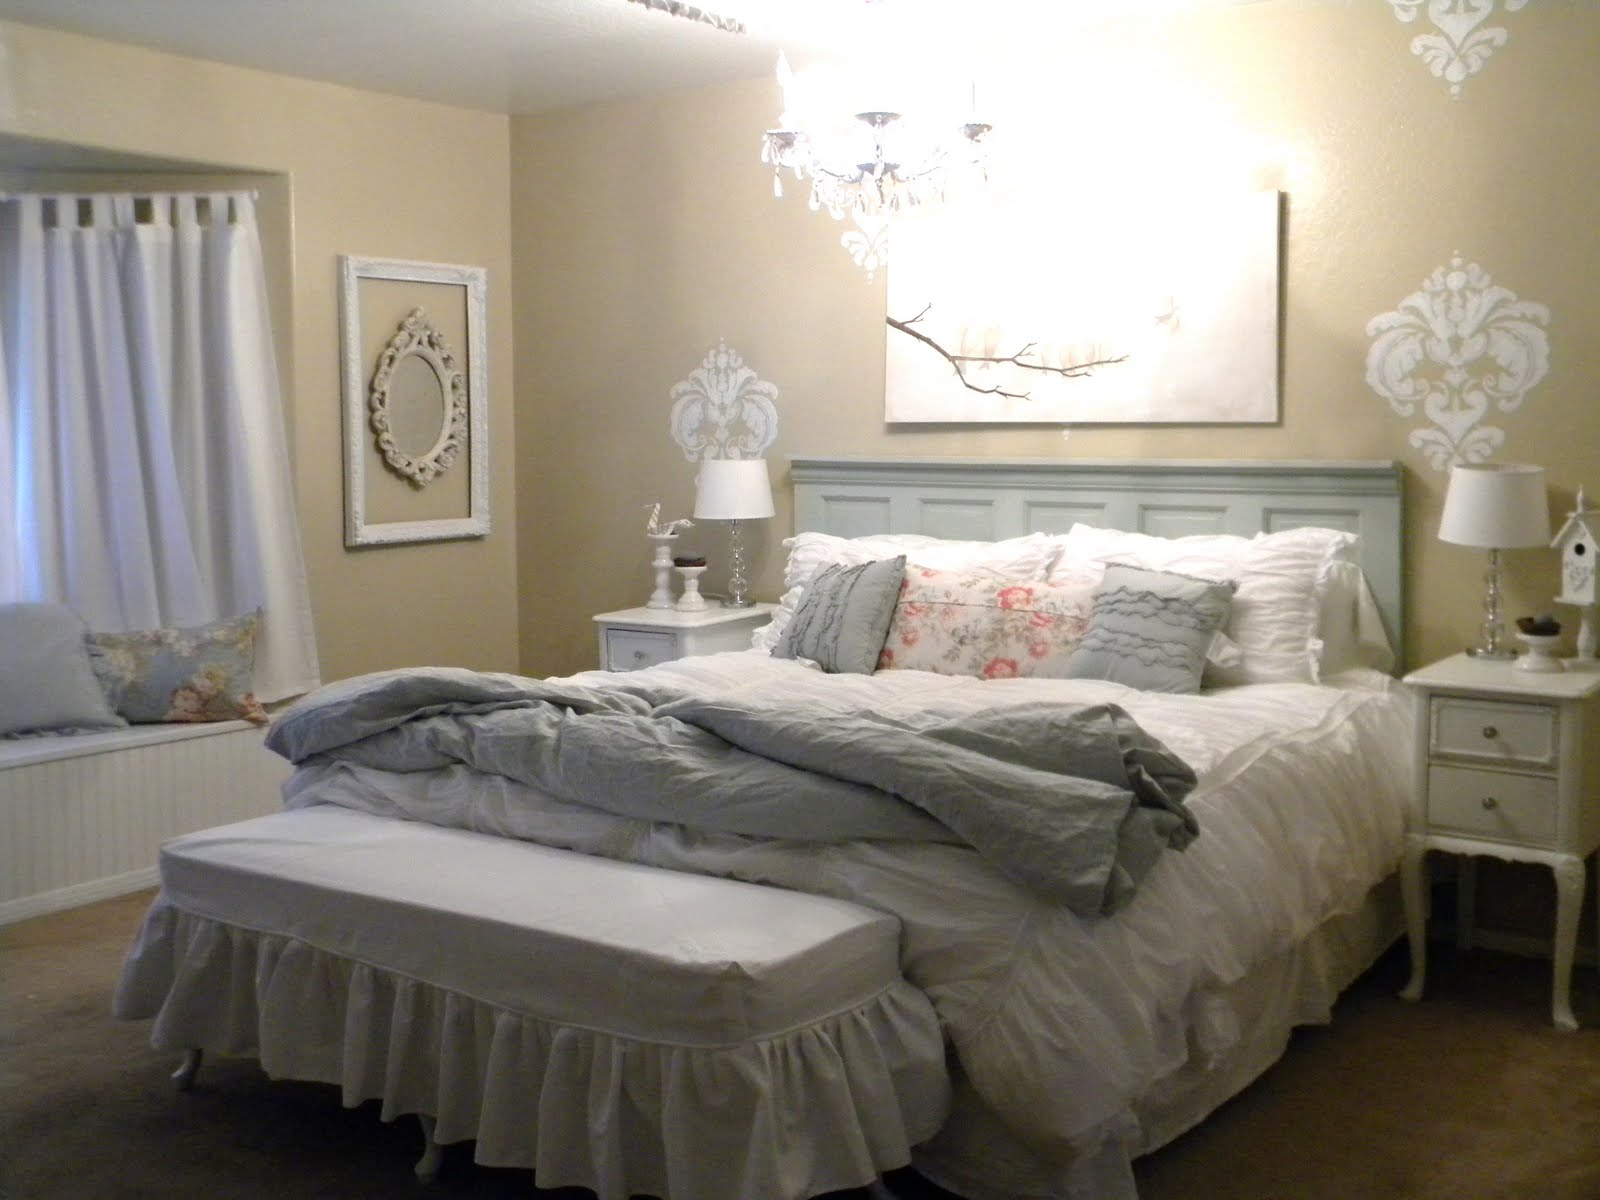
The damask print on the focal wall was done using a stencil my friend cut out of vinyl lettering. I stuck it onto a blank stencil I bought at hobby lobby and used an exacto knife to cut it out. Then I just drew it on the wall and painted it by hand.

The chandelier was from my lovely sister Tara. We spray painted it white and made a white cord hider from an old sheet.

I got the mantel from my Mom. She was kind enough to donate it to the cause and we painted it blue.

My carpenter/husband built this amazing storage solution/reading nook. Did I mention what a hunk he is? I guess he will think twice before coming with me on a job! We built the window seat with a door at the top you can take off and store stuff you don't want out. Plus it makes a great nook for reading or watching the kids sword fight in the back yard.

I got the bench at the foot of her bed on craigslist. It was a beautiful mauve color. Ok, maybe it wasn't so beautiful. After a quick slipcover made out of duck cloth for %50 off at joanns, it fit much better in the room. And I didn't have to use a seam ripper once. Which was a first for me.

The art piece was my favorite project. I've never painted on canvas before and it was really fun. I don't know if you remember me talking about Alicia before but she recently lost her sweet boy. She has 5 children still here so I wanted to do an art project that reminded her of her family and the one who "flew" away. When I gave it to her she started crying and said she loved it so I think she got the message.

She wanted a little memory box made for her son. So I made a shadow box from some kind of antique sifter. We pinned his blessing outfit to it and put up a picture of him.

The headboard was out of that door in the "before" shots. I used some 1x4 pine and a little molding and then painted it blue.

Now here's a breakdown of the costs. Once I wrote them out, I was surprised by what I spent the most on. You'd think the furniture would be the most expensive.

$250 on bedding (ebay and home goods)
$100 on furniture (end of bed bench, dresser, night stands, mantel and headboard)
$100 on paint and accessories
$ 50 on lumber for the window seat

That's a grand total of $500. Yes I spent every penny of our very small budget. Yes I shopped at Goodwill and dug lumber out of the cull bin at Home Depot. But I stayed on budget. One more image just because...