Tuesday, May 26, 2015

I got a life time of knowledge

Have you ever wondered why when you pick out paint colors, it looks like the perfect gray color in the store and straight up purple on your walls? Here's why...

LIGHTING!!! Lighting is so so important. Before you even pick the color, you have to factor in how much natural light the room gets. Other random factors- Flooring. If you have a whole house full of cherry wood, your paint colors will reflect it, making everything look slightly pink. If you have a ton of windows and a forest of green out the windows, the green tint WILL change the colors in the room. Fortunately, changing out the light bulbs can balance out any of those factors. The best situation would have a ton of natural light and a mixture of layered light (recessed, overhead, task, etc)

That being said, if you live in a cave, you can easily simulate that scenario. Picking out the light bulbs for the space can be a game changer in regards to color for your walls. I'll break it down for you...

Incandescent bulbs- are most commonly used. They're cheap and available pretty much anywhere. They also have a warm glow, leaving a yellow tint on paint colors. This bulb will make your whites appear cream and your blues appear green, etc. Cool colors look horrible with this type of bulb.

LED-... what am I a Rockefeller?

CFL's- like incandescent but last longer. Leaves a warm glow. the slight down side... these bulbs contain chemicals that can eat through your skin if broken. Buuuuuuuut, they're RECYCLABLE! So that totally makes up for it, right? ;) DONT GOOGLE IT. THE IMAGES ARE DISTURBING.

Fluorescent- We all know these from cold office buildings. These generally leave your paint looking blue or green although they are manufacturing some now that give a warm tint. They can't be put on a dimmer but I have 4 kids so romance is not an option anyways.

Halogen- These bulbs are the only bulbs I buy. They simulate the closest light to "natural daylight" and don't corrupt your paint color choices as much as the others do. 

So before you get all mad and change your paint color for the 18th time, try changing the light bulbs in your space. I promise it will dramatically affect the color of your paint. 

Also, here's a pretty picture of my old kitchen and the antique chandeliers I used above the island. Because I can't do a post without a photo. Note the natural light that was EVERYWHERE in that house. I miss that. Sniff. Oh, and by the way, the paint color here in called chocolate froth from Home Depot. I think it's a behr color. It was the perfect greige for a home with a ton of natural light. 


Thursday, April 23, 2015

Flea Market tactics

If you're from Arizona, it's likely you haven't been to many flea markets. Personally, I'm so glad it's gotten more trendy here because I love them. Like, a lot. So, I thought it appropriate the week before one of the biggest flea markets in Az, Junk in the Trunk Vintage Market, to do a post with the method to my madness for a successful shopping trip.

First things first. Make a list of items you hope to find or things you need for a current project. For my ADD scatterbrain, this is absolutely crucial. I tend to just get overwhelmed (especially in large crowds like at JITT) when there's so much to look at. It helps me focus in each booth and also helps me not spend as much. This obviously excludes the love at first sight, have to have with no where to put it, great pieces that are always at JITT. Here's my list of items I'll be on the lookout for next weekend.


Now, and this is crucial, don't forget a wagon/ basket/ stroller/ husband to carry around all your smaller purchases. JITT gives you tickets and hauls away your bigger items to be loaded later but they don't do that for smaller items. I carry and cross body bag for really small items and push something similar to THIS for the impossible to shove in a purse items.


If you forget this step, you'll probably be hating your life and looking as ridiculous as this guy. Which is me after every trip to the grocery store. I'd rather dislocate my arms than walk out to my car twice. 


Lastly, bring 2 or 3 water bottles because spending all my husbands money is hard work, amiright? And remember that not all vendor accept cards so bring an appropriate amount of cash. That also helps diminish the paper trail back to the hubby. ;)

I'll be doing a post on IG spotlighting my top 10 favorite vendors and their booth numbers soon. Stay tuned!


Saturday, April 11, 2015

DIY marble cutting boards and cake plates

I promised this post on Friday. It's only Saturday so... that goes in the win column. As some of you know from following me on instagram, my husband and I recently finished a project using some countertop remnants from my last home. I installed carrara marble and love love loved how it looked.  I had a small piece left over so I hoarded the extra piece in my garage until I could come up with a way to use it.

While at perusing world market one day, I saw these babies...


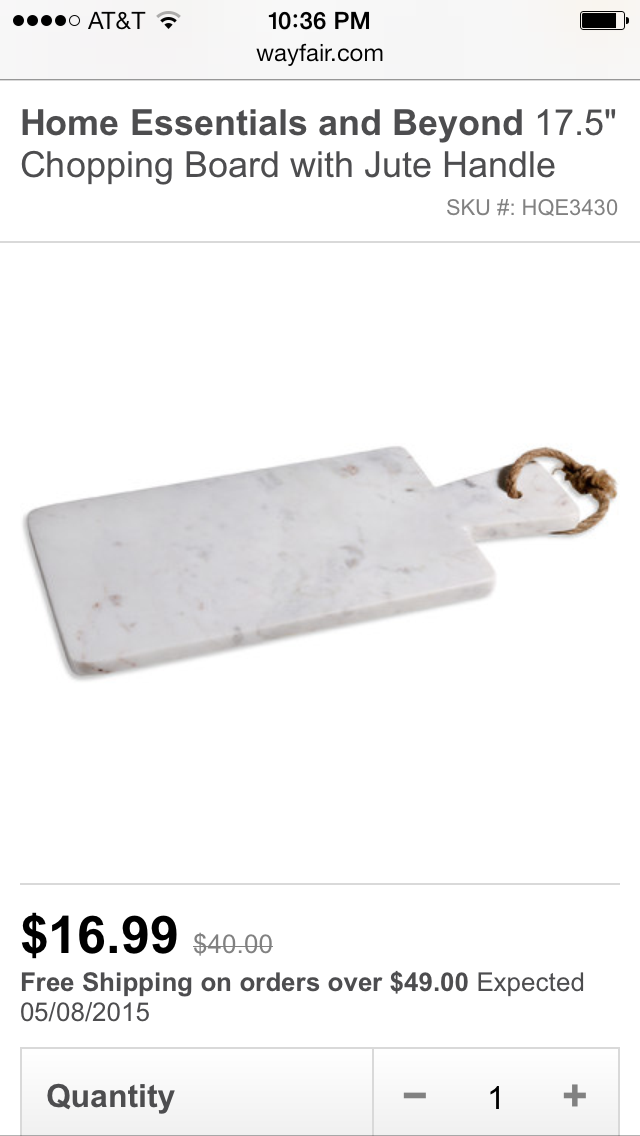
And these from wayfair. Hello nurse.


And knew exactly what I wanted to do with the remnant. I was scared to tackle this project because stone is so hard. In my brain, I imagined pieces chipping off and flying into my eyes and being blind for the rest of my life. Which is obviously a reasonable fear. So I googled how to cut your own marble and found a number of ways to do it. What we ended up using was a mixture of an angle grinder with a masonry wheel and a jig saw with a diamond blade. I traced a few patterns on the marble using a couple different sized bowls and cutting boards that I already had.


The diamond bit was purchased at Home Depot in the tile section. When I asked where I could find it, the guys at home depot had no idea what I was even talking about. Then again, one day I asked where a speed square was and some dude said they didn't have it. Uh... ok. Does this bother anyone else? I know men are proud and junk but if you don't know, just say it. Ugh. So anyways, I wandered around until I could find it myself.

The angle grinder was perfect for the straight sides and the jig saw blade worked perfectly for the round parts and corners.


The jig saw worked exactly like it does with wood, just took way longer. The main thing I learned was to go slow and keep it wet. The diamond blade cuts way better when it stays wet. So we just poured a little water from a bowl as we went.


Sorry the picture sucks. I was trying to show the water, the jig saw, and the tile while taking a picture and I'm pretty sure there was a kid tugging on my leg for me to push play on a movie or something. Anyways, we just poured a tiny bit of water while we were cutting and it worked way way better. After the forms were cut out, I just sanded down the edges with a sander like regular wood. It worked like a charm.


I glued the round cut outs to a few candle sticks I bought from Target. Here they are in all their glory. I love how they turned out. I had some fun taking pictures of them at my friend Kalli's house. She has a plethora of awesome accessories at my disposal. Here they are in her gorgeous kitchen.


And here are the cutting boards. I was so glad to be able to use my left over marble and do a project that intimidated me. It's so fun to learn new things. Now I can say I've cut marble. I've also won a state championship and helped deliver a breach calf. But those are stories for a different time. If you have any questions, feel free to ask away!