
So on spring break of this last year, a producer, sound and camera guy came to work with us. They were seriously some of the coolest people I've met. By the end of the week we were all laughing so hard, it's a miracle we got any work done. Yes, quite a few scenes were "enhanced" in the drama department. It's reality television, it has to be interesting, right? I knew the way they edit it could make me look like a totally crazy person but it wasn't that bad. Anyways, I'm sure you want to get to the details so here goes. Here is what the great room looked like right when we bought the house.


The first day of the renovation was all demolition and the concrete counter top. Ideally, we would have poured the counter top in place but that wasn't really an option since we hadn't even built the island yet, not to mention the floors weren't down. And we needed at least 3 days for the concrete to dry. The concrete mix we got was a specially formulated powder that is specifically for counters from Lowes. It dries faster, harder, and sturdier making it ideal for our job. I ordered the egg and dart mold for the edge from THIS Utah based company. We then built the mold, finish nailed the rubber edging on, caulked it and then sprayed the crap out of it with cooking spray. Butter flavored ;) (If you saw the show, you know this didn't work. I'll explain later how we finally got the concrete to work for us.)
Then we beat up a ton of stuff. I wish I would have taken pictures while we were doing it, but I guess you have a whole episode showing you those. Demo was my favorite part. I love breaking crap. There is something so therapeutic about hitting things with a sledgehammer. After the carpet, tile, built ins, and island were up, it was time for us to put up drywall and mud. This was by far the CRAPPIEST part. I normally would have hired this part out, but.... you know, we had to.
After that was laying the flooring. I've talked about this on my IG a lot but here it is for you. We wanted a really rustic, really inexpensive product that would allow the kids to be crazy and still have it look good. So I ordered 6'' wide, 3/4" thick plain pine planks. They are kiln dried and are NOT tongue in groove. We installed 3/4" plywood to the concrete with glue and then stapled the wood planks to the plywood. Stapling them allowed us to pry the boards that were slightly crooked closer together for minimum gaps. The total amount for flooring ended up being about $2 a square foot. That's dirt cheap if you haven't priced out flooring. After they were stapled, I stained them dark walnut from Minwax and did one coat of polyurethane. Now that I've lived with it for a while, I'm still pretty happy but I should have done 3 coats of poly after. We just didn't have the time for it. If you want perfect, pristine floors, these are NOT for you. My kids distress them and they look more aged. They get crackers in the gaps and I vacuum them out once a month or so. But they also look like they belong in an old cabin which I absolutely LOVE. And I mop once or twice a month, they hide dirt so well.
Moving on, we had beautiful carrera marble installed and I'm still in love. The biggest problem I've had has been slight clouding from oily foods. But again, I'm not a perfectionist so I don't even remotely care. The marble broke on one side but I think it was from a natural vein that made it weak. We haven't replaced it yet, we just kind of glued it back together. We are going to install butcher block on that side that matches the island legs some day. The backsplash is regular white subway tile from Home Depot and has a medium gray grout. The cabinets were painted with Benjamin Moore's advanced paint. This paint is the BOMB. It has all of the good properties from other paints. It self levels like an oil, cleans up like a water based, and dries hard like an alkylid. Love, love, loved working with it. The hardware on the cabinets are from Martha Stewarts line at Home Depot. The paint color is "Chocolate Froth" from Home Depot. It's a Behr color and I love it. It's a true greige. It looks great with browns and grays. If you don't have a ton of natural light, try the color just darker, "Wheat Bread".
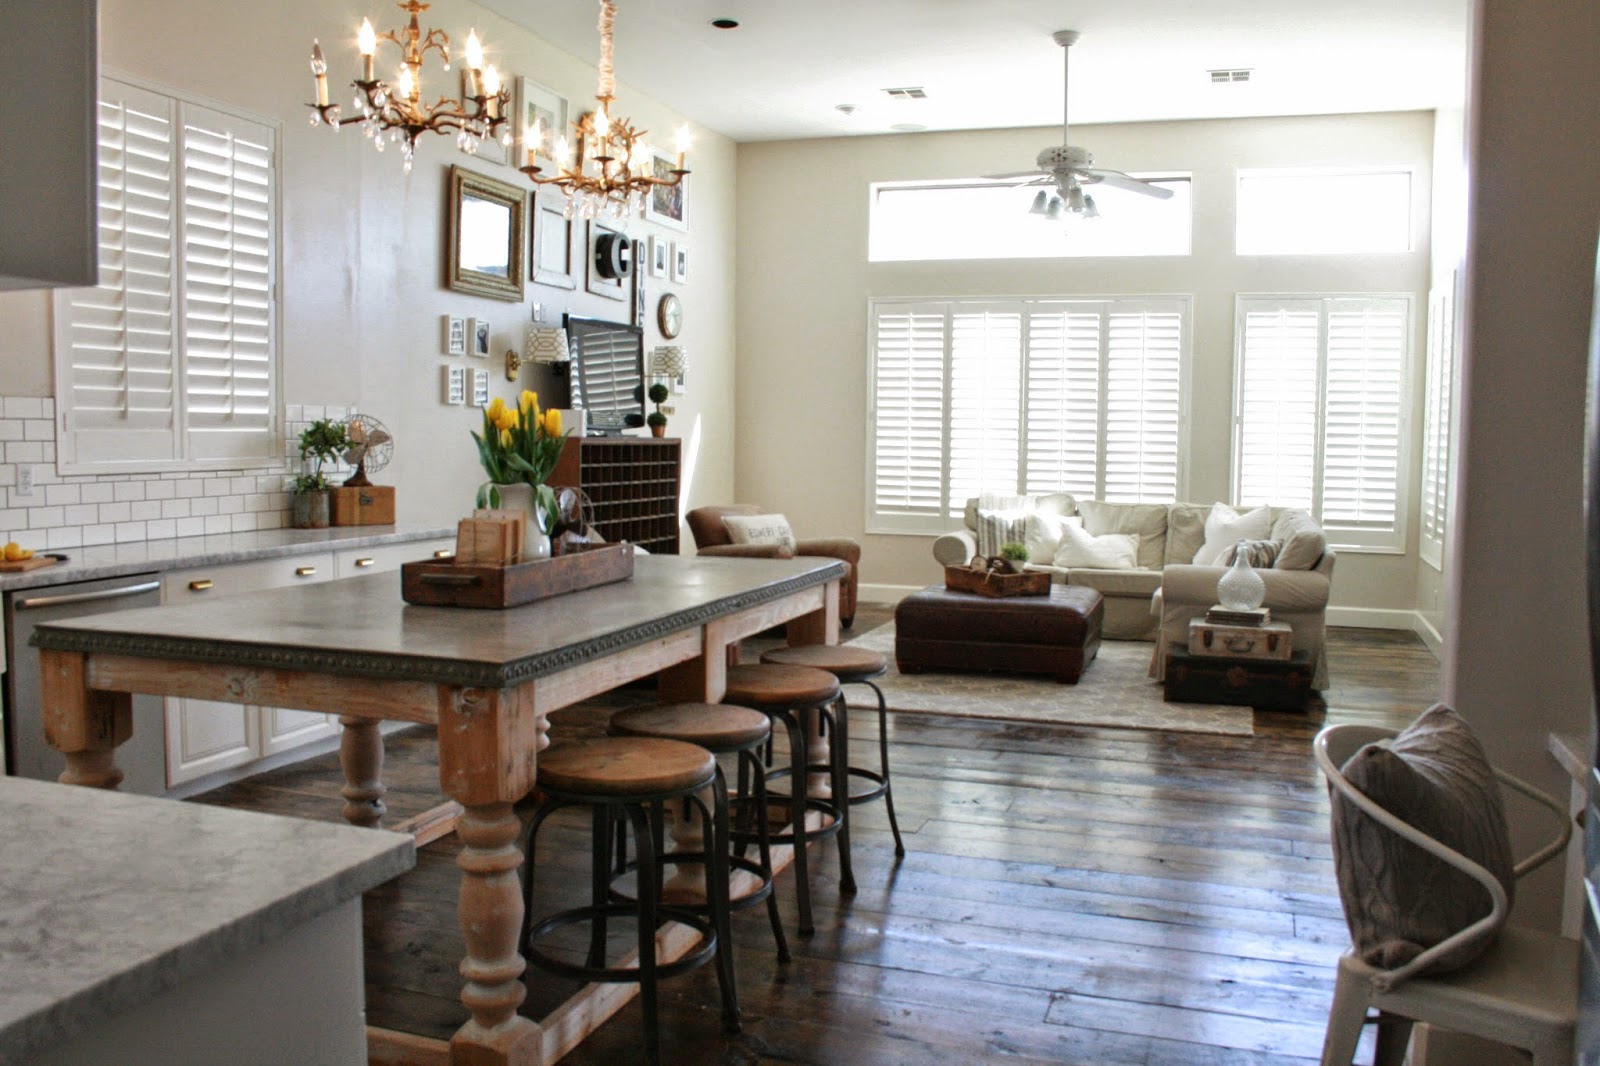
Ok, the island. I've gotten so many questions about this so I'll try and provide as much info as possible. Like I said before, I ordered the rubber edging mold from Expressions limited. It was the most expensive part of the island. I think the reason why it failed the first time was because it dried too fast. It was partially in the sun and it was hot for March. Once we saw that it cracked, we ordered more concrete so we could pour it in place the second time around. The island legs were spun out on the lathe by my husband. I bought the 6" thick wood from a guy on craigslist who pulled reclaimed beams out of a renovation. We used a silhouette screwed to a board to make them all the same. I posted a video to instagram of him cutting them out a while ago. It's kind of hard to explain. Here's a bunch of after photos!
.jpg)

.jpg)


.jpg)


Love, love, love everything about this!!! That kitchen island is my absolute favorite!! Amazing transformation!!
ReplyDeleteLove everything. Thanks for sharing. ��
ReplyDeleteYour episode was cute and your room looks amazing!
ReplyDeleteI am so upset because it turns out we don't get the DIY network! I so wanted to see you guys!! The great room looks beyond amazing and that is the most fabulous kitchen island I have EVER seen!!
ReplyDeleteThank you so much for sharing all your ideas! You guys did such a wonderful job. We are in love with the floors and are seriously considering trying them in or home. My husband and I were wondering about how you fastened them with the staples. Did you just do them on the one side like when installing tongue and groove, or did you fasten them from above as well???
ReplyDeleteThank you from Idaho!!!
Anna
Wow what a change and for the better. You guys were cute on the show I really liked that you worked as a team and didn't get snarky with each other. That wall of builtins looks so much better. I was a lil surprised you didn't wear eye protecting tho. You guys did a tremendous amt of work in a short time. The puppy was adorable, and I think you answered all my questions
ReplyDeleteHere's my question:
ReplyDeleteI know you can overwhelmed, and you can be underwhelmed, but can you just be "whelmed"?
Oh my gosh, I'm watching the show now!! Your poor chickens and your poor water logged husband!! I love renovation realities, and I saw the last name and thought it looked familiar. :) how exciting!
ReplyDeleteI loved your episode and LOOOVE your kitchen! My question is how many square feet of countertops did you buy for the marble and about how much did it cost? We didn't think we could afford carrera but of your whole budget was $5000, then maybe we can! Any tips or details would be awesome! Thanks so much!
ReplyDelete